Elastomer Rubber Keypad Webbing Explained

Elastomer Rubber Keypad Webbing Explained

Over the years, we’ve written a number of posts regarding the benefits of using molded silicone in keypad assemblies. One question that frequently gets asked by many of our customers is what type of webbing should be utilized and integrated into the rubber keypad design. 

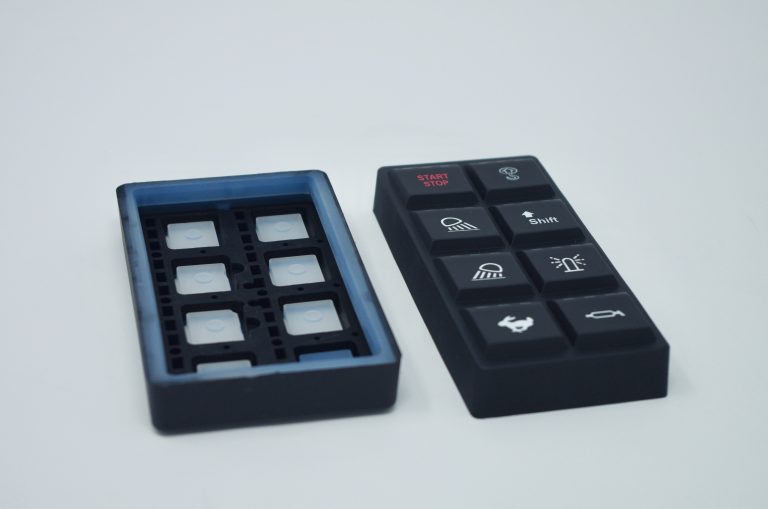
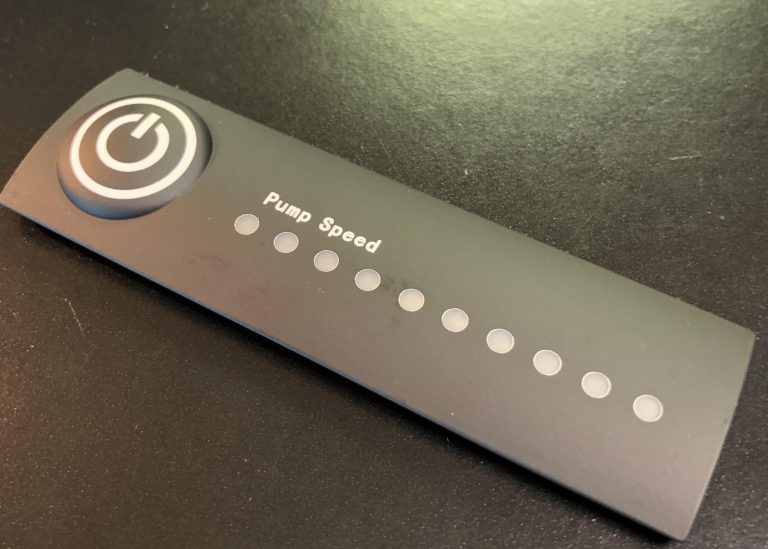
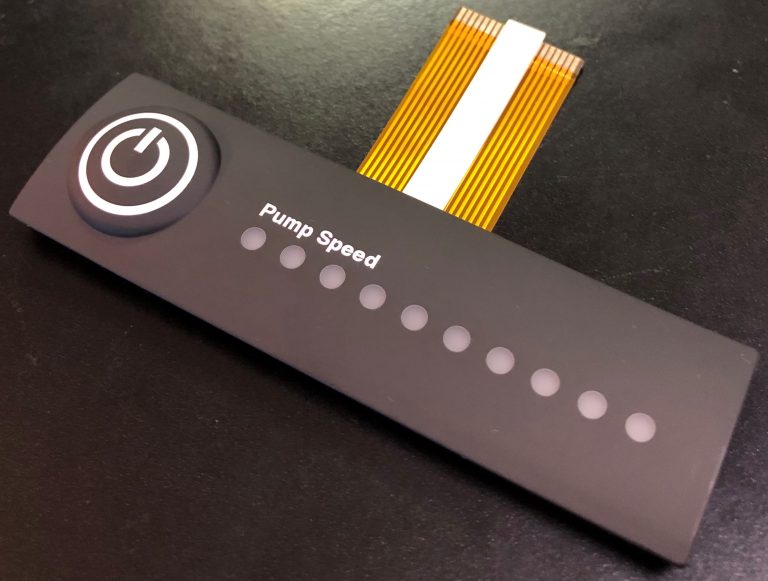
There are a number of factors that should be taken into consideration when answering this question and they really are dependent on the end product’s functionality requirements. For instance, does the particular product call for a keypad with buttons that are relatively difficult to actuate to avoid accidental activation of keys? Does the product require a keypad that has buttons that are easy to activate? Does the product call for buttons that make an audible tactile snap when pressed? Regardless of the requirement, we have a number of methods to customize your elastomer keypad to work and feel a number of different ways.

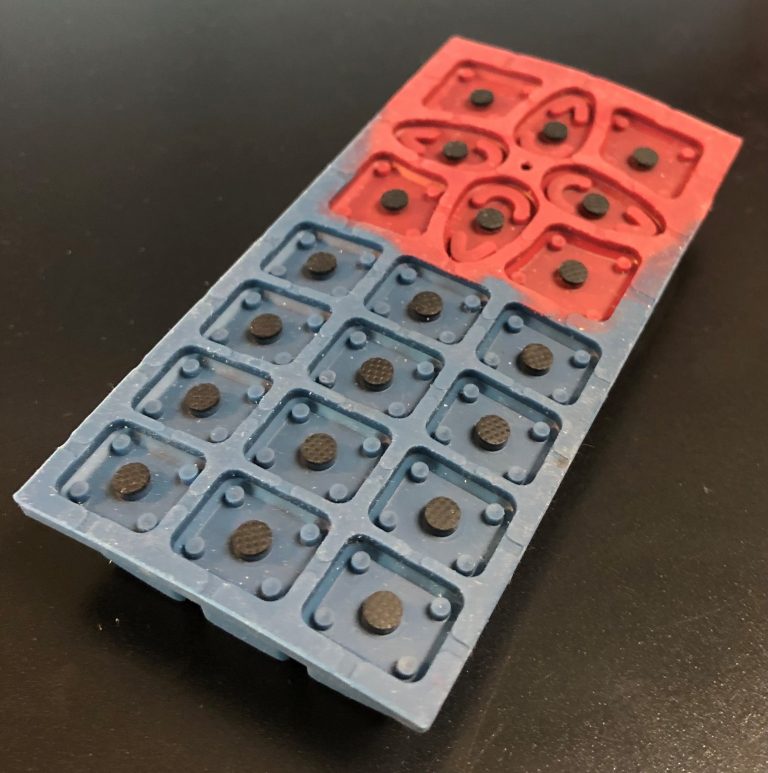
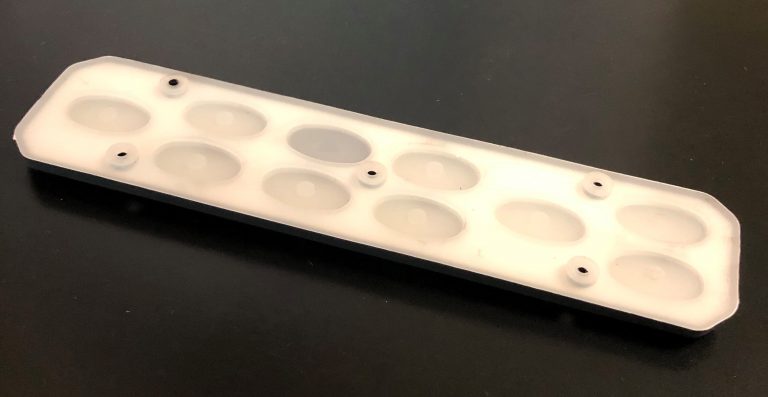
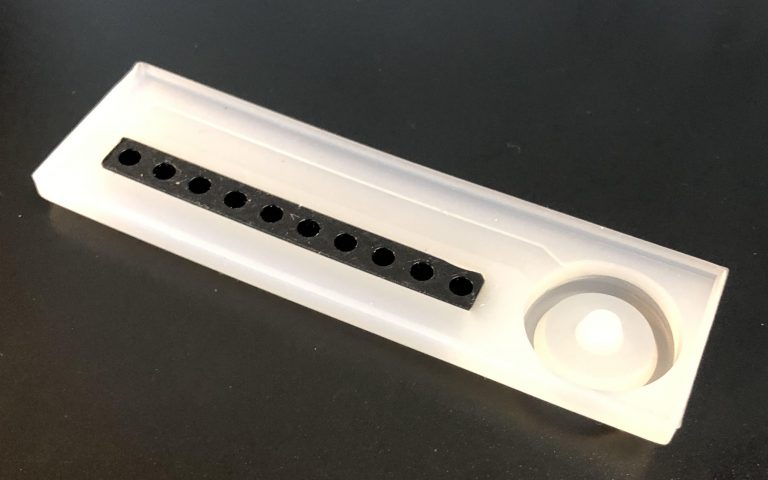
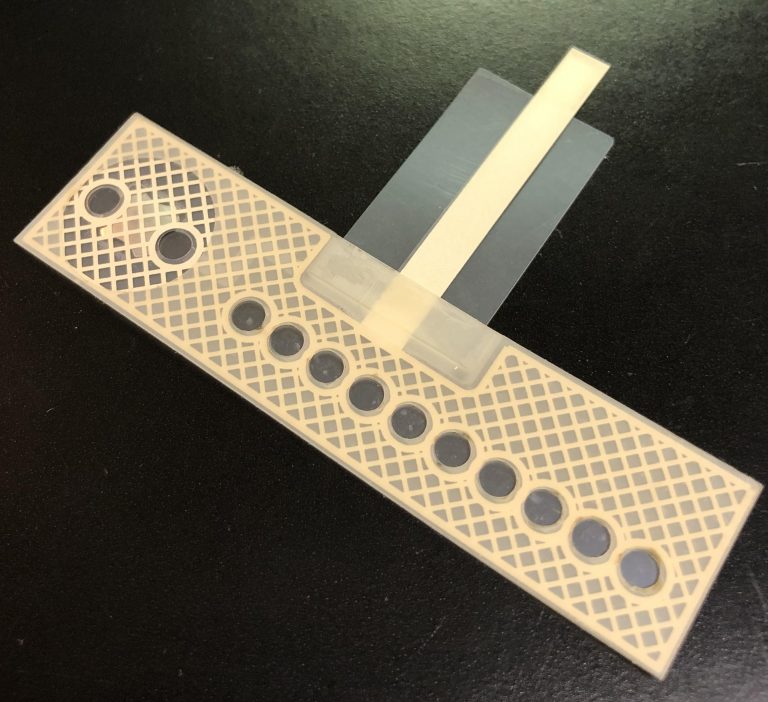
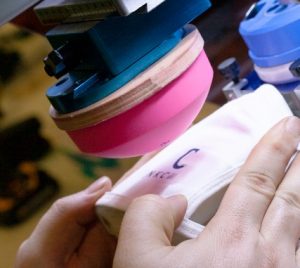
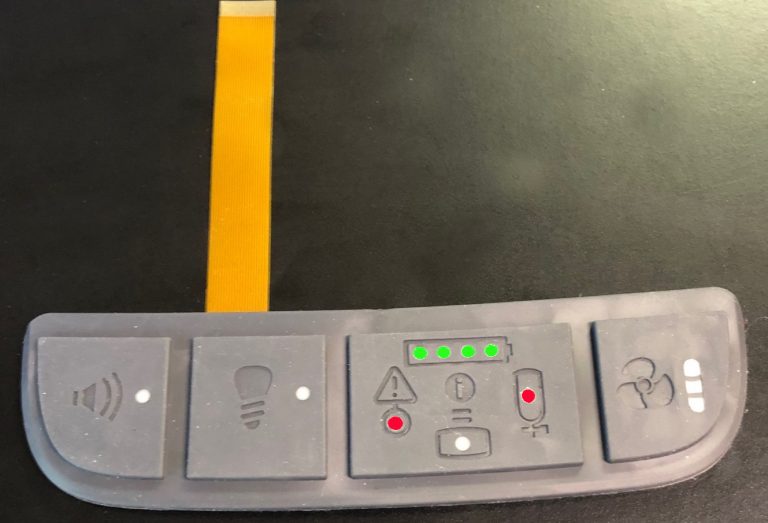
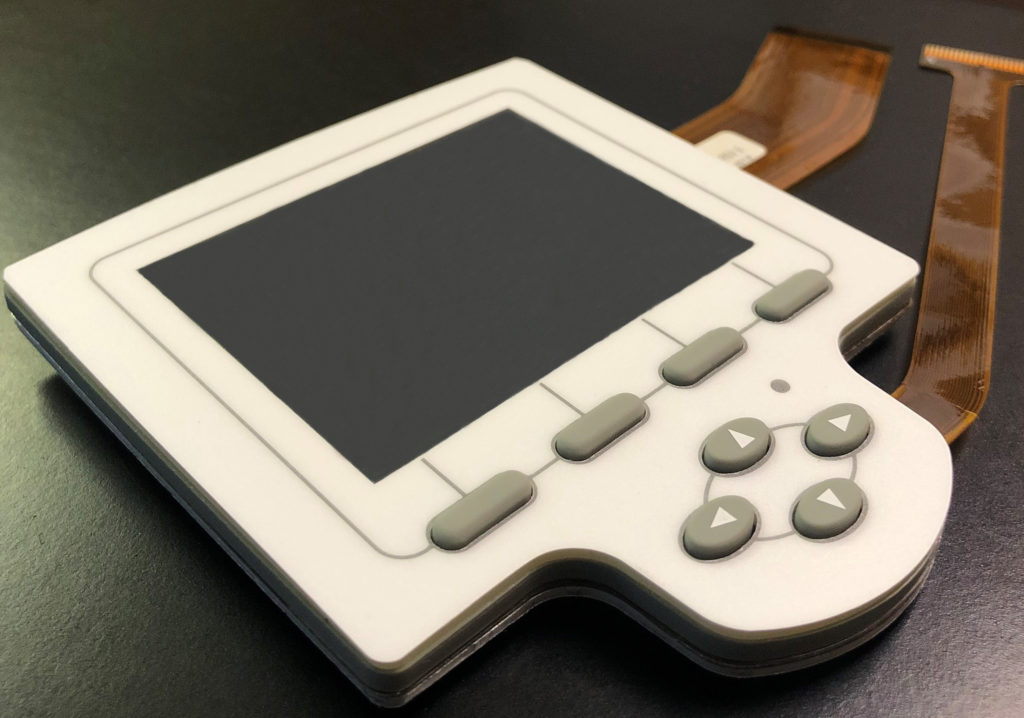
The main design feature that is utilized is the webbing or flex wall. An elastomer button with an active web design has a small web or flex wall at the base of the button that flexes when the button is pressed. The resistance of this flex wall gives a tactile response as the button is pressed. The tactile response lets the user of the switch know that the key as been actuated. This particular design requires a carbon or metallic pill or puck which is molded into the underside of the rubber button. This pill completes the circuit when the button is pressed by making connection with the contact designed into the board or circuit. More on carbon pill technology can be found here. 

In contrast, a dead web rubber keypad design has buttons that do not include any web at the base of the keys or very minimal webs. By not using a web or flex wall, there must be some method of providing tactile feedback to the user. In this design, we typically use a metal dome which is placed under the rubber key. The metal dome makes contact with the board or circuit and provides the tactile audible feedback when pressed. There are a multitude of metal dome options that can be integrated into the keypad with different sizes and actuation forces really allowing the customer to get the exact feel they desire. More on metal dome technology and options can be found here. 

Rubber Keypad with Flex Wall & Carbon Pills
Rubber Keypad with Dead Walls

Sealing Methods for Rubber Keypads

Sealing Methods for Rubber Keypads

When designing a product, one of the most critical considerations is sealing requirements. A properly sealed product prevents unwanted substance intrusion into the device. While internal components (most importantly electronics) are typically protected by the main enclosure, it is equally important that the keypad or interface area is also properly designed and sealed. Any weak-points related to the HMI or HMI area, can potentially allow for ingress of dust, liquids, and other substances that can cause permanent damage to the product. 

The good news is that there are a few methods that can be designed into the HMI to completely prevent particulate ingress. Below are some of the most common types of sealing methods used in our keypad designs:

Perimeter or Frame Seal: One of the most common methods of sealing, this method involves designing a frame of adhesive that goes around the perimeter of the keypad preventing any liquid or chemical ingress. Because it requires a specific amount and type of adhesive for an effective seal, the available space on the bezel and under the overlay is an important consideration. It is also important that there are no components on the edge of the keypad in order to accommodate this frame of adhesive.

Compression Seal: When using a rubber keypad design, the elastomer can act as an excellent seal as it has great compression and gasket-like characteristics. The silicone rubber is molded to be compression sealed to the front of the part or compressed from the sides into a well where the keypad sits. The compressed rubber offers a high level of protection from liquids and chemicals.

Wrap Around Seal: When using a rubber keypad design, the silicone rubber can be designed so the rubber actually wraps around the edge of the part, sealing off the front and edges of a device. The rubber wraps around the keypad’s internal layers, keeping the circuitry safe from any particulate ingress.

Front Surface Seal: If there are any openings in the front of the product’s bezel or case (typically around the perimeter of the part), front surface sealing can be an effective option. A sealant compound is dispensed into any openings or gaps in order to prevent particulates or liquids from entering. This is typically a “last resort” type of option, as the sealing process can be labor intensive and the final outcome not as aesthetically pleasing with a potting compound around the perimeter of the keypad. 

Rear Surface Seal: Rear sealing involves sealing any openings behind the keypad, typically around tails or cables that come through the rear housing of the device.

Perimeter Seal
Compression Seal
Wrap Around Seal

Designing a Sealed & Backlit Rubber Keypad​

Designing a Sealed & Backlit Rubber Keypad​

Designing a rubber keypad that is both backlit and completely sealed may seem like a daunting task, but that’s what the experts at CSI are here for!  There are essentially two main components of the keypad assembly that must be properly designed: the rubber and the circuit. To better speak to the process, we will use the sample keypad on the right side of this post.


Rubber Decorating Process:

  1. The rubber starts off as a clear/milky translucent color (the color of the base material). The black portions of the keypad are rubber light blocks that are molded into the rubber to prevent light from bleeding into other portions of the keypad.
  2. The rubber is then sprayed translucent white.
  3. The rubber is then sprayed opaque black and then laser etched down to the translucent white material (for the power button) and hte clear base material (for the LED indicators) in the areas that are backlit.
  4. The rubber is carefully designed so that the actuators on the back of the keys press into the metal dome switches efficiently. 
  5. The rubber is also designed so that it provides a seal. Silicone is typically used for gasketing in many products, so why not utilize it’s properties for the same reasons in your keypad?!
  6. The rubber is then sprayed with a UV resistant coating that protects the keypad from ultraviolet exposure, while also providing chemical resistance. 


Additional Sealing Features:

Copper Flex Circuitry, also known as polyimide Kapton circuitry, are used in the majority of CSI Keyboards’ keypad designs due to its excellent dielectric strength, thermal stability, chemical resistance and flexibility. Copper Flex membrane switch panels are produced using polyimide (Kapton) as the base material. Copper flex switches are manufactured by laminating a thin sheet of copper to a flexible film substrate. The copper is then chemically etched away, leaving the copper traces. An additional layer of polyimide is laminated to the circuit leaving the gold contacts exposed. Copper flex has become the superior choice over printed silver especially for outdoor applications. Copper flex circuitry construction designs offer a significant advantage over printed silver and a printed silver circuit can be replaced with a copper and polyimide construction with minimal additional cost.

Seal Frame is a perimeter frame of adhesive that protects your circuitry from any moisture ingress. It have proven to be as robust as other sealing methods such as perimeter temperature sealing and can be included in your design at minimal additional cost.

PU (polyurethane) Coating was applied, which protects the printed and molded colors on the rubber keypad, and also increases the longevity of the printing and graphics. This coating ensures a longer keypad life regardless of the environment. We also utilize a proprietary coating specially formulated for marine and outdoor applications which provides added protection against UV exposure.

Rear 3M 300LSE Adhesive was utilized, which is the top of the line adhesive specially formulated to provide high bond strength to surfaces. Our adhesives are resistant to humidity, UV, water, temperature, and chemicals.

EMI/RFI and ESD Protection is obtained using a metalized Mylar shield layer. A separate tail for the shielding layer was designed to connect to the housing or another mechanical piece already grounded. Another option could have been grounding to a trace on the interface panel and then routed to a grounded plane on the motherboard to carry the static charge away from any nearby conductive components.

Utilizing Vias in Membrane Switch Circuitry

Utilizing Vias in Membrane Switch Circuitry​

When designing a membrane switch on a flexible printed circuit, the circuit can often require either vias or a double-sided circuit design.

What are vias?

Vias are small holes, typically measuring approximately .008”, that form a pathway between two sides of the circuit material. Vias allow electrical connections to flow between both sides of the circuit substrate. The circuitry ink is essentially forced through these small holes which create the via connection. If you look at a two-sided circuit membrane, the holes will be located at the end of the routes (as shown in the picture to the right). 

Why are vias used? 

Vias are typically used due to the size and space constraints, where the membrane switch circuitry has a small footprint that is unable to accommodate the circuitry routing and traces. By utilizing vias, we are able to use both sides of the circuit substrate which essentially doubles the real estate without having to increase the size of the part. 

Silver Migration in Membrane Switches​

Silver Migration in Membrane Switches​

Silver Migration Explained:

Printed silver is a metal that has been used in the flexible circuit aspect of membrane switches for over 35 years. The conductive silver is screen printed on flexible substrates (typically polyester or polycarbonate) to form the conductive traces that are the electrical backbone of a membrane switch. Silver is still widely prevalent in membrane switch designs to this day due to its conductivity, usability and cost-effectiveness.

There are some disadvantages to using printed silver, however. Silver is a very active metal and is thus highly susceptible to silver migration or dendritic growth. Silver migration is the ionic movement of silver between two adjacent traces on the circuit. Silver migration will occur if there is moisture present between the two traces which results in a temporary electrical short. The rate of migration depends on the amount of moisture, the temperature and the voltage.

Preventing Silver Migration:

While silver migration can be a major headache for membrane switch users around the world, conductive silver certainly would not have been used in keypads for over three decades if there wasn’t a solution:

  • Prevention is the ultimately the best solution. Preventing moisture ingress into the circuit will prevent silver migration from ever occurring. Properly designing the membrane switch using a frame seal is one of many methods CSI utilizes to prevent your keypad from silver migration.
  • Utilizing copper flex circuitry instead of printed silver circuity.
  • Covering the silver traces with a protective carbon layer and/or an overcoat dielectric.
  • Increasing the conductor spacing between traces on the circuit.
  • Reducing the voltage.

What are the Differences Between Screen Printing, Digital Printing & Pad Printing?​

What are the Differences Between Screen Printing, Digital Printing & Pad Printing?​

Screen Printing:

Membrane switches have always utilized screen printing to print circuits and graphic overlays. 

Screen printing is a process that uses a woven mesh stencil to transfer ink to the material underneath or substrate. The stencil contains the actual design or artwork. The screen sits atop the product that will receive the image and a squeegee is moved across the screen to fill the open mesh apertures with the ink to create the design on the substrate.

The process was known as silkscreening because silk was originally used as the material. Nowadays, synthetic materials are used in the screen printing process typically polyester, nylon, or stainless steel materials. 


Digital Printing:

Digital printing is the process of sending information from a device, typically a computer, to the printer using digital files created by graphics software. The information is reduced to binary code for storage and reproduction. 

Digital printing is ideal for membrane switch designs that are more complex than the traditional artworks such as 3D graphics, textures, fading, half-tones and other effects that cannot be screen printed.

Pad Printing:

Pad printing is a process that transfers a 2D image onto a 3D object. Pad printing is typically used to print images on to more difficult products or surfaces. It involves three main components: an etched plate, a silicone pad to transfer the image, and the substrate. An image is etched into the flat printing plate which is then filled with ink. The silicone pad has a very smooth surface with chemical resistances which is then used to carry the ink from the plate and transfer it onto the object. The silicone material is ideal because it does not absorb the ink and can adapt to irregular shaped surfaces.

CSI Develops Heavy Duty Military Keypad

CSI Develops Heavy Duty Sealed Military Keypad

Product: Heavy Duty Military Keypad

Case: Customer approached CSI requiring an environmentally sealed keypad solution that would not only be able to withstand constant outdoor usage, but more importantly withstand exposure to mustard & sarin gas. 

CSI Final Solution:

  • Liquid-Injection Molded Santoprene (mustard and sarin gas resistant) with debossed graphics and LED indicators
  • 100% environmentally sealed keypad that passes all of the customer’s requirements including mustard and sarin gas resistance.
  • Metal dome switches with LED indicators with additional customer electronics/components integrated into the circuit
  • Copper flex circuit for additional environmental durability
  • Stainless steel backer for rigidity

Designing a Turnkey HMI Assembly

Developing a Full Turnkey HMI Assembly

Designing a full turnkey human machine interface assembly may seem daunting. But CSI Keyboards has over 35 years of experience specializing in the integration of the below technologies into complex user interface turnkey keypad assemblies which has made us the one stop shop for all HMI turnkey interface solutions and front panel input interface assemblies and modules that incorporate electronic components. 

Our broad and diverse product line and engineering expertise allows us to design and manufacture fully integrated interface solutions at a lower cost and better flexibility for our customers. Customers all over the world rely on CSI Keyboards to design, manufacture, and assemble the whole turnkey user interface.

Advantages of an HMI Assembly

By providing the entire value-added assembly, CSI not only minimizes the amount of moving parts for our customers but also overall time and cost. It also allows our customers the ability to place one single purchase order under one single part number for the entire interface. Our longstanding supplier relationships and over 35 years of manufacturing and assembly expertise provides increased control and lower costs for your company.

Medical Keypad Interface Assembly
 
The Medical Diagnostics interface was created for rapid and real-time influenza 
detection. Both its mechanical and electrical design and assembly are tested to
meet medical industry standards.
 
Characteristics:
 
  • Graphic overlay faceplate
  • G10 backer for rigidity
  • Silicone rubber keys with dome switches
  • Display with capacitive touch screen
  • Copper flex circuit assembly loaded with electronics
  • Metal backer for mounting
  • Flex tails exit rear of assembly for connection

CSI Keyboards Update on COVID-19

CSI Keyboards Update on COVID-19

A Letter to Our Valued CSI Customers & Partners,

The State of Massachusetts has issued an emergency order requiring all businesses and organizations that do not provide “COVID-19 Essential Services” to close their physical workplaces and facilities to workers, customers and the public.  We want to ensure you that CSI Keyboards realizes the critical role your products play in the global marketplace and we remain committed to meeting all of your requirements. 

CSI Keyboards will continue our operations as we are considered an essential and critical manufacturer, providing essential products to customers in vital industries: medical, law enforcement, emergency medical services, oil and gas, fire services, transportation services, and national defense services. This, of course, is subject to our Management’s active and ongoing monitoring and contingency planning around any further relevant COVID-19 developments in accordance with applicable federal, state and local health guidelines. 

We are in daily contact with our major suppliers and do not currently foresee any issues meeting your requirements.  We are also aware that many companies are reviewing their inventories and we are prepared to support your increased needs to the best of our ability.  Please let us know if you have any other needs or services with which you think we can assist.  With the everchanging constraints due to COVID-19, we remain flexible in our approach to service your company and manufacture your products.  

CSI Employees continue to practice proper precautions which include (but are not limited to):

  • Social distancing (staying at least 6 feet apart from other individuals).
  • Wearing masks and gloves when necessary.
  • Washing hands frequently and thoroughly throughout the day.
  • Increased hand sanitizing stations throughout the building.
  • Told to stay at home if exhibiting any influenza-like symptoms such as fever, cough or shortness of breath.
  • Temperature of all employees taken at the beginning of each work shift.
  • Notify Management immediately if an employee believes they been exposed to the virus either inside or outside the premises.
  • Absolutely no visitors are allowed on the premises unless they have obtained prior authorization from Management.
  • The building will continue to be disinfected at the end of each day.

CSI values the health, safety and well-being of you and yours.  Please be as safe, vigilant, and proactive as possible. 

As always, please do not hesitate to reach out to us if you have any questions or concerns.

CSI Develops a Full Turnkey Medical Keypad Interface

CSI Develops a Full Turnkey Medical Keypad Interface


A customer recently approached CSI requesting a full turnkey medical interface design. Their product required an integrated display, light bar for indicating status of the product (3 colors), IR sensor, a buzzer and four keys. The product is a medical device, so it was also critical that the keypad was environmentally sealed and chemically resistant. 

Medical Keypad Interface Assembly
 
Characteristics:
 
  • Graphic Overlay 
    • Window for Display
    • Window for Light Bar
    • Red Transparent Window for IR Sensor
  • Printed Circuit Board Assembly:
    • TFT Display adhered to rear of PCB
    • IR Sensor mounted to rear of PCB
    • Buzzer mounted to rear of PCB
    • RGB LEDs
    • Light Guide Film 
    • Dome Switches

Backlit Status Light Bar:

By utilizing side-firing LEDs and Light Guide Film (LGF), CSI Keyboards was able to design and develop a membrane switch with an LED light bar. The CSI Engineers used RGB LEDs, ensuring that they were mounted/located in areas on the PCB that would ensure optimal backlighting. The next step was designing the Light Guide Film ensuring the light guide prisms were designed for optimal backlighting and eliminating any chance for hot spots. 

Blue Backlit Light Bar

Blue Backlit Light Bar

Yellow Backlit Light Bar

Yellow Backlit Light Bar

Red Backlit Light Bar

Red Backlit Light Bar